Standing rigging is the wire, rod and fittings that hold the mast up, and inspecting it means checking every terminal, fitting and fastening from the deck and, when needed, aloft. Work from the lower ends upward, look for cracks, broken strands, corrosion and worn pins, and use a magnifier, a nylon stocking and a sharp bend test where needed. Inspect in detail regularly, before any long passage, and whenever something looks wrong. Replace any part that shows a crack, and call a rigger when you are unsure.
Why does standing rigging fail?
Riggers generally estimate that standing rigging lasts about a decade, according to Cruising World (2019). That figure is not a fixed failure date. The likelihood of problems rises after that point, and real service life depends on use, load and environment, with freshwater use and lighter loads extending it.
Failure usually starts where loads and salt water meet. Practical Sailor reports that most problems occur at the lower, deck-level terminals. Swage terminals, the crimped fittings found on many boats, also depend on climate. Practical Sailor states that swages can last 15 to 20 years or more in northern latitudes and tend to fail sooner in southern ones, where higher temperatures and salinity accelerate wear. Most Canadian sailing takes place in northern latitudes, so the longer end of that range is more relevant to Canadian readers, but age alone is not a reliable guide.
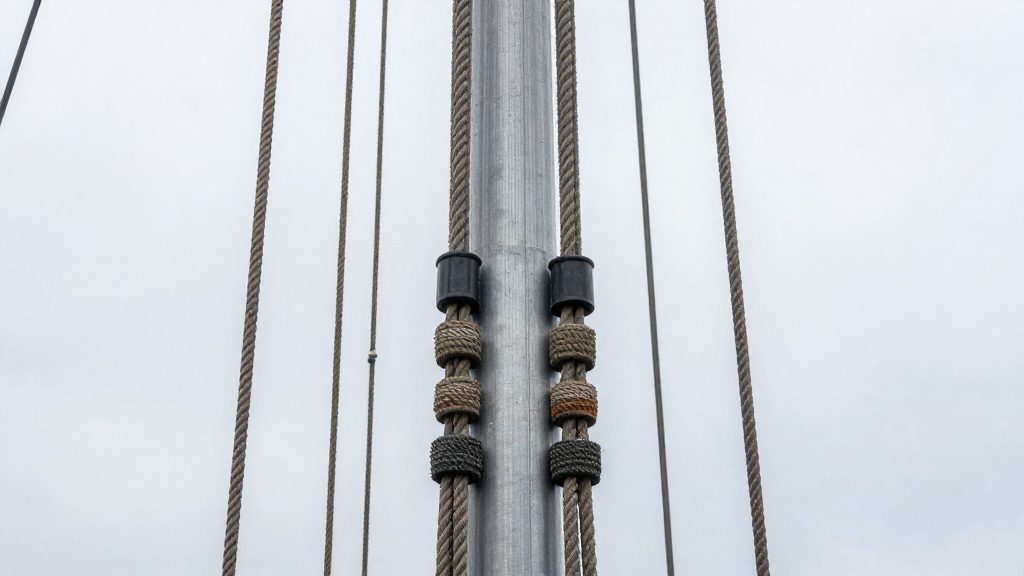
Fatigue, corrosion and wear hide in different places. Fatigue shows up as broken wire strands and cracks in terminals. Corrosion hides under paint and inside fittings. Wear builds in clevis pins and their holes until a pin no longer carries the load as designed. Cruising World warns that one failed fastener, such as a worn ring pin or a loose cotter pin, can start a dismasting, so small parts deserve the same attention as the wire.
What tools do you need for a rig inspection?
A deck-level check needs little equipment, but the right tools matter. A bright flashlight and a magnifier are essential, because hairline cracks in swage barrels and shoulders are easy to miss. A nylon stocking is the simplest test for broken strands: drawn along the wire, it snags on strands that have broken. Keep masking tape or a marker to record rigging screw positions, the correct wrenches for locking nuts, and spare cotter pins and clevis pins in the right sizes. A clean rag and a plastic scraper or fine abrasive pad remove grime without damaging the surface. Rust often hides cracks underneath, so clean a fitting before you judge it.
Going aloft requires a bosun’s chair, two halyards, a safety line and two people on deck, as described below.
How do you inspect standing rigging from deck level?
Start at the lower ends. Good Old Boat recommends this sequence because, if the lower ends are sound, the rest of the rig is usually in better shape, though you should still inspect aloft. Mark the thread position of each rigging screw with tape so you can restore the same setting, then release the lock nut or pin. Do not loosen a shroud completely unless something else is holding the mast. Ease tension gradually and watch the mast and the other stays as you go.
With tension eased, examine each wire, terminal and clevis pin. Bend the wire sharply just above the end fitting. According to Good Old Boat, supple wire springs back, while fatigued wire keeps the kink and needs replacement. Run the nylon stocking along the wire and check for snags. The rigging screw should turn freely, and its threaded section should be straight. Inspect the chainplate where the wire attaches for cracks, rust stains and enlarged clevis-pin holes. Replace worn or corroded clevis pins rather than cleaning and reusing them.
Give priority to the headstay, the upper shrouds and the backstay, including their ring pins, cotter pins and locking nuts. Cruising World identifies these as the components where a single failed fastener can start a dismasting. Also look for corrosion where stainless steel meets aluminum, such as at spreader tips. When the lower ends are done, return each rigging screw to its marked position.
Underway, Cruising World recommends walking the deck daily at sea to confirm that toggles, clevis pins and running rigging are correctly seated, and scanning the rig with binoculars from the cockpit.
What should you check when going aloft?
Going aloft is the only way to see the masthead, but it carries real risk, so treat the climb as a rigging job in its own right. Good Old Boat notes that the skipper usually goes up, because the skipper is responsible for the rig’s safety. Test the chair at deck level before trusting it, including a small bounce, and use a sturdy chair with a solid seat. Attach two halyards to the chair with separate shackles or knots, and do not rely on a single snap shackle. Keep a safety line from the chair to the mast at all times.
Two trusted people should tail the halyards and keep them taut while watching the climber, and the area below should be kept clear. Climb only when the boat is afloat, not on the hard. On the way down, the primary halyard should take the weight, with no more than two turns on the winch, according to Good Old Boat. If the person aloft is uncomfortable or the chair is not behaving, lower them at once.
While aloft, check the masthead pins and sheaves, the sheave boxes, the cap shroud and lower shroud tangs, the spreader ends and boots, and the lights. Cruising World advises going aloft in a bosun’s chair before offshore passages or long coastal cruises, so schedule the climb before you leave rather than during the trip.
Terminals, swages and chainplates: what to look for
Swage terminals need the closest look. Practical Sailor describes two failure patterns. Vertical cracks at the top of a swage mean salt water has run down the wire and rusted the fitting, and the shank can rupture so the wire pulls free. Horizontal cracks are generally metal fatigue rather than corrosion, and Practical Sailor says such fittings have no safety margin and must be replaced immediately. Cruising World advises inspecting swage barrels with a magnifier for cracks and pitting, and checking wire ends for cracks too. If you find either crack type, inspect the rest of the standing rigging before sailing, since the other fittings are likely the same age.
Mechanical terminals have their own checks, mainly for wire slippage and cracks in the body of the fitting. Practical Sailor notes that mechanical fittings grip the wire with a wedge, which reduces corrosion, and that they can be reused. They cost more than swages, and a common compromise is swages at the upper terminals with mechanical fittings at the lower ends.
Chainplates and mast steps are often where a dismasting begins. Cruising World advises checking for crushing, cracks, crazing or corrosion. On a deck-stepped mast, look for fibreglass crazing, microcracks or changes in the surrounding contour. Around a chainplate, look for deformed laminate, and for damage to wooden bulkheads or the metal webbing that supports it.
Signs of corrosion and fatigue
Watch for rust or black stains around fittings, cracked fittings, uneven strand loading, worn or elongated clevis pins, and pitting. On aluminum masts, chalky bubbles in the paint usually mean corrosion underneath, often at dissimilar-metal fittings or on poorly prepared surfaces. Good Old Boat says that corrosion, pitting and enlarged fastening holes weaken the spar, and that major corrosion needs professional attention. Black marks around T-ball rivets indicate movement and may be serious.
Check tang bolts too. According to Good Old Boat, if a nut sits tilted toward the mast at its top, the bolt is likely bent and should be replaced. Bent or distorted hardware is a clear sign that the load path has changed.
Transverse cracks, meaning cracks running across the direction of load, signal impending failure. A visual check after cleaning can reveal them, but a magnifier will not show a crack that is closed or hidden under corrosion. Dye penetrant testing finds only cracks that open at the surface, so a rigger should choose the method and interpret the result.
When should you inspect and replace rigging?
Cruising World recommends a detailed inspection every few years, ideally with the mast unstepped. Before an extended voyage, inspect the full standing rigging, and inspect sooner if the lower ends look questionable. Good Old Boat suggests considering removing the mast for a ground-level check before a long trip, which gives a far better view of the chainplates and mast step than a deck check alone.
Replace a part at once if it shows a horizontal crack in a swage, broken strands that the bend or stocking test reveals, a bent tang bolt, or a cracked chainplate. Replace clevis pins that show wear. Consider replacing the whole rig when it reaches the age range discussed above, especially if inspection finds wear you cannot resolve.
Transport Canada’s maintenance guidance for pleasure craft covers pre-departure checks of the hull, engine, hoses, fittings and safety equipment, updated in 2026, but it does not set a rigging inspection schedule. The manufacturer documentation for your specific fittings is therefore the reference for service intervals, and no general figure replaces it.
When should you call a rigger?
Call a rigger or a qualified marine surveyor when you find any crack in a terminal or fitting, when a chainplate or mast step shows deformation or cracking, when a spreader or the mast moves in a way you cannot explain, or when you cannot confirm a fitting’s condition. Swaging a terminal or heading a rod needs specialist tools and the manufacturer’s procedure, so leave that work to a professional. Lower ends that will not free with gentle penetrating oil and patience also call for help rather than force. A rigger can give a measured judgement that a visual check on deck cannot, and asking for that judgement is a sound seamanship decision, not an admission of failure.
Frequently asked questions
Is a Transport Canada courtesy check a rigging inspection?
No. The free Pleasure Craft Courtesy Check, delivered by trained volunteers often with Canadian Power and Sail Squadrons, looks at safety equipment and other requirements. Transport Canada states that it is not a formal assessment of the vessel’s condition, and owners remain responsible for compliance and safety.
How do I free a seized rigging screw?
Apply penetrating oil and allow time for it to work. Do not force the screw or apply heat to the wire. If the thread is damaged or the screw will not turn, have a rigger assess it before you adjust the rig.
Can I sail with a fitting I am not sure about?
Not until someone qualified has looked at it. If you cannot tell whether a crack is present, treat the fitting as failed, keep the boat ashore or on a mooring, and arrange a professional check before you put the rig under load.