A cleat hitch is the standard way to hold a loaded line on a horn cleat so that it stays secure and can still be released by hand. Take the working end, the end that leads to slack, to the far horn, pass it around both horns in a figure eight, then finish with a locking turn, or leave the hitch unlocked when the line may need to come off quickly. Before tying, make sure the cleat suits the line and the load. The official sources consulted do not specify a cleat-hitch method, so the steps below describe the technique commonly taught in boating courses, not a legal requirement.
Why use a cleat hitch instead of a simple knot?
A cleat hitch lets one person control a line under load, adjust it and release it without a winch or a helper. Its holding power comes from friction. The figure eight spreads the force across both horns, and each turn grips the line against the one beneath it, so the load is shared rather than carried by a single turn. That makes the hitch suitable for dock lines, fender lines and sheets. It is not a substitute for a secure mooring. A hitch can creep or work loose when the boat surges in waves or the wind shifts, so a cleated line that carries a heavy or constant load needs regular checks and, where needed, a second line or a spring line to take the strain.
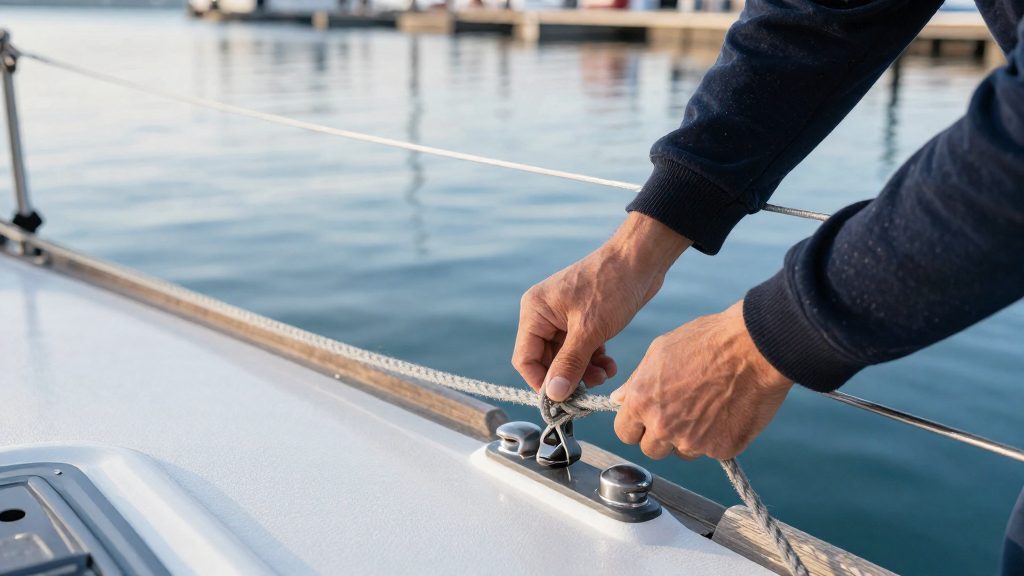
How do you check the cleat before you tie off?
Start with the fitting itself, because no knot can make up for a loose or undersized cleat. Confirm that the cleat is firmly fastened, with its bolts or screws tight and its backing sound, and that there are no cracks, worn edges or sharp burrs that will chafe the line. Check the manufacturer’s documentation for the cleat’s size range and rated load. The sources consulted do not give a rated load for horn cleats in general, so the manufacturer’s figure for your model is the only reference, and a cleat should never be loaded beyond it.
Next, match the line to the cleat. A line that is too thin for the horns will slide and jam, and one that is too thick will not seat between them. Inspect the line as well. Frayed, stiffened or chafed sections should be cut back or moved away from the cleat before the line is loaded. Finally, check the lead, which is the path the line takes from the winch, fairlead or bow to the cleat. The line should reach the cleat without rubbing an edge or passing over another line.
How do you tie a cleat hitch step by step?
- Put one turn around the base of the cleat before the line takes any load. This turn carries much of the holding and stops the line from sliding while you add the figure eight.
- With the working end, pass to the far horn, go around it, then cross the top of the cleat to the near horn and go around it. The two passes should form a figure eight, with each crossing lying beside the last rather than on top of it.
- For a line that is slippery, small or new double braid, make a full figure eight before locking. Keep every turn tidy and centred on the cleat.
- If the situation calls for a lock, pass the working end under the last crossing. Lay the end neatly so it does not run across the lay of the line.
- Dress and test the hitch. The loaded part and the tail should leave the cleat in the same direction, and the tail must be long enough that it cannot pull through. Give the line a firm tug and check that nothing shifts.
When should you lock the hitch?
Locking is not always needed, and it is the step most often done wrongly. The locking turn holds the hitch fast when the boat moves in waves or the line vibrates, so lock it when the boat will be left on the line in motion or when the line is slippery. Skip the lock for lines that must be released quickly under load, such as headsail sheets. For those, a single turn around the base is the usual choice, because it can be cleared in one movement.
A locked hitch is also harder to release when it is wet, iced or swollen by cold, which matters in cold weather. Lock a hitch only once, and plan to ease the load before you try to clear it.
What mistakes make a cleat hitch fail?
- Loading the line before the base turn is in place. The line can run off the cleat before the hitch forms.
- Taking too many turns or locking more than once. The cleat becomes crowded, the line is harder to release, and the extra turns add little hold.
- Using only a partial figure eight on small or slippery line, which can slip free.
- Locking across the lay of the line, so the lock jams rather than seats.
- Twisting the turns the wrong way, which can trap the line.
- Leaving too little tail, so the working end pulls through.
- Failing to tighten the hitch before the load comes on. It should be snug at the start and checked again after the first load.
How do you release a cleat hitch under load?
Never release a loaded hitch by pulling on the working end. The load can run the line out suddenly and without warning. First take the strain off by easing the load with a second line, a winch or a spring line. Then lift the locking turn, and lift the figure eights off one at a time, starting from the top. If the hitch is jammed, do not force it and keep your hands away from the point of tension. Ease the load under control before you work on the knot again.
If the line begins to run out of control, stand clear of its bight, the loop of slack, and let it go rather than trying to hold it. A knife is a last resort, because a line cut under load can recoil with force.
How do you practise safely before docking?
Practise on a quiet dock with the boat secured, using a spare line of the same type you will cleat. Begin with light tension, tie the hitch, check it, then release it. Repeat until the steps are automatic, then try it with a helper pulling gently on the line. Choose calm conditions for practice rather than a crowded arrival with wind on the beam. Handle the line with gloves, and keep your fingers out of the turns while the line is under tension.
For general safety rules on securing a vessel, consult the current edition of Transport Canada’s Safe Boating Guide, which is the official reference for boating safety in Canada.
Frequently asked questions
Does Transport Canada require a specific knot for mooring?
The official sources consulted do not specify a knot for mooring. Check the current edition of the Safe Boating Guide for the general safety rules that apply to your vessel.
How often should cleats and their fastenings be inspected?
The official sources consulted do not give an interval. Inspect them before each season, after heavy loads or storms, and whenever a fastening or the deck around it looks disturbed. Follow the manufacturer’s maintenance advice where it exists.
What is the difference between a cleat hitch and a clove hitch?
A clove hitch is tied around a post, spar or rail. A cleat hitch is formed around the two horns of a horn cleat, so use it only on a cleat.